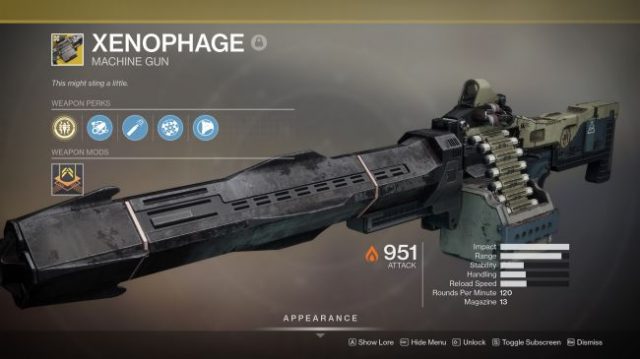
The Xenophage — that exotic gun with a bug in it.
The Xenophage: a brand-new exotic machine gun in Bungie’s Destiny 2 that was launched alongside the Halloween content Festival of the Lost
Players can obtain this extremely potent weapon by beginning the quest “The Journey.”
This is Destiny 2’s second exotic machine gun and it also has a bug in it – as in, it has a small wasp-like creature inside the housing of the weapon itself. It also comes with a mighty set of perks. It comes with a 13-round magazine and a very slow rate of fire, but every shot fired procs with a small-radius explosion that can rip through trash mobs like a chainsaw.
Here’s how you get Xenophage.
Step 1: Emerge from the Darkness
To begin this the quest, head to Shadowkeep’s Moon region. There is an area next to the Pyramid it’s possible to get there by entering the portal next to Eris Morn (or it’s also possible to walk there through Sorrow’s Harbor).
In the room where Eris normally sits after the completion of a memory there will be four statues. It is necessary to light all four statues to begin.
To successfully do this, the statues must be lit – to start, interact with the “Emerge from the Darkness” prompt and then light the statues. It’s hard to say if the order is randomized or not but we went anti-clockwise starting with the closest on the right, then the furthest right, then the furthest left, then closest left.
A message will finally appear, “You have emerged from the dark – claim your path!” and a chest will spawn. The exotic quest “The Journey” will start upon opening the chest.
Step 2: Light some torches
It’s time to go to the Anchor of Light on the Moon. Upon arrival, head to the north-west and find some yellow buildings, one of which is a large radio tower.
Directly south is a yellow building with symbols scrawled on it and an opening. Inside is a fiery-glowing Hive orb.
The objective here will be to touch the orb against six different braziers in the nearby region in a particular order. There is one minute between each lighting, so it’s useful to get an idea of the path before starting the whole journey – especially because things will be shooting at you the entire time.
Above is an animated GIF with the correct path revealed by the wonderful critters at GamesRadar+.
Step 3: Solve the Path Fragment Puzzles
Now you’ll receive some clues as to what to do next. The clues are a bit cryptic and weird but they appear to refer to Dark Sectors on the Moon – all four of them – so that’s where the trek will lead next.
Within each Dark Sector there is a wall puzzle made up of lines drawn on tiles on the wall. The tiles shift as each tile is shot with a weapon. This alters the 3×3 grid in different ways – the objective is to continue to shoot tiles until the puzzle matches the symbol on the tile above it.
The Fragments have multiple solutions, but these were worked out (in most part by Spider on Reddit) and should work fine.
K1 Communion (Anchor of Light)
- Bottom left
- Bottom right
- Center top
- Center top
K1 Logistics (Archer’s Line)
- Center left
- Bottom left
- Center right
- Center
K1 Revelation (Sorrow’s Harbour)
- Center right
- Center left
- Center
- Center
- Center left
- Center top
- Center bottom
- Center
K1 Crew Quarters (Hellmouth)
- Top right
- Center left
- Center
- Center bottom
- Center right
- Center right
- Center bottom
- Center bottom
Completing these puzzles will reveal four map fragments and this will unlock the next stage for obtaining Xenophage.
Step 4: We must go deeper
The next step is the “Path Uncovered” and that leads to the Pit of Heresy dungeon. If you have not unlocked it yet, you will need to do that at this point to continue The Journey.
Completing the first phase of the Pit will lead to a room with a wall filled with doors. One of the doors does not have a rune hanging over its awning – inside is an interactable rune that acts as a hidden switch.
Step 5: Light more torches
After this, continue onwards into the Pit until the second phase. From there travel down the left side to a giant glowing green cavern with a giant rib cage below. Along the edge of the path, down the lower path, there is a plate. Activating the plate will reveal platforms that will help traverse the abyss.
Jump over the platforms and acquire the Hive orb of fire. Continue back the way you came and try to stick to the right side – this could be tricky due to invulnerable ogres – the end goal is a door with two braziers outside that need to be lit.
When they are lit progress will continue.
Step 6: Boss fight! Volmar, the Tempted
Inside the room opened is a boss, a Hive Witch, who must be defeated.
To fight her you will need to use four runes in the corners of the room. Each rune corresponds to an energy type indicated by a glowing orb below it – blue is arc, red is solar, purple is void, and white is physical.
In the boss room there is a fiery Hive orb and four places to deposit the light. To determine where to deposit it, first determine the type of debuff you are under—indicated in the bottom left side of the screen – it follows the same colors as the previous room. Grab the light ball, rush it to the correct brazier, and you get a 30 second buff that will allow you to damage the boss using the energy type matching the buff.
You will want a varied weapon loadout to make this happen as efficiently as possible.
Upon defeating the boss, you will receive an item, which will need to be handed to Eris Morn and she will give you Xenophage.
Recent Comments